Years ago, 10 to be exact, I was a skinny little 7th grader taking a technology course in middle school. I don’t know if things are still done the same way, but back then we took mini-courses called “modules”. We would spend a week learning all about a specific task or topic and then switch modules and partners at the start of each week.
Tech lab was always one of my favorite courses because we got to play with new technology and learn new skills. One module I took was all about learning to handle a bank account, specifically, a checking account.
So, we learned reconciliation and writing checks, and all of the basics. Since I’m not sure if they still do that type of thing I thought it might be helpful to provide our lesser-informed readers a little info about check writing. Here’s the seven simple steps to writing a check. Enjoy!
Steps to Practice with Starter Checkbook:
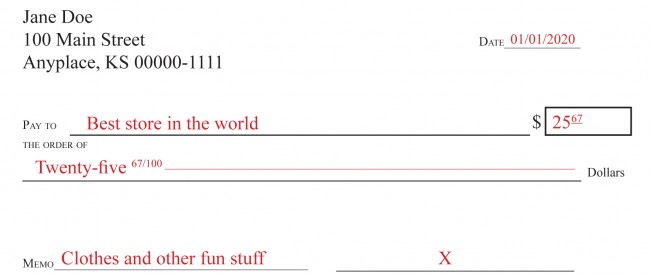
1) Enter the date in the upper right-hand corner.
2) Write the name of the person or business that you are making the check to on the “Pay to the Order of” line.
3) Write the amount in number form next to the dollar sign, including dollars and cents.
4) Write the amount of the check in word form.
5) Draw a line after you write out the amount in word form. This helps prevent people from adding more to the amount.
6) Include any information you’d like on the memo line, such as for what you are paying.
7) Sign your check in the space provided (marked “x”); it cannot be cashed or deposited into an account without your signature.